File Share Migration to Sharepoint Online / Office 365
File Share Migration to Sharepoint Online and Office 365
Migration to Sharepoint Online and Office 365 can be a daunting task to professionals who are wanting to move their file shares to the cloud.
Through true and tried solutions, this blog identifies a low cost and effective way to migrate your files from a shared file share to Sharepoint Online and Office 365. We will touch on the following tools:
- OneDrive – https://onedrive.live.com/about/en-us/download/
- WebDrive – https://webdrive.com/download/
- SyncBack Pro – https://www.2brightsparks.com/syncback/sbpro.html
- FilesToGo – http://www.thinkscape.com/SharePoint-Online-File-Migration-Tool/

It is important to note the limitations and restrictions that Microsoft has on the amount of files, files that can be browsed in a particular view, naming conventions and other caveats that can make the process a little more difficult.
Please review the following articles to gain insights on the limitations and restrictions:
- OneDrive – https://support.microsoft.com/en-us/help/2933738/restrictions-and-limitations-when-you-sync-sharepoint-libraries-to-you
- Sharepoint Online – https://support.office.com/en-us/article/SharePoint-Online-limits-8f34ff47-b749-408b-abc0-b605e1f6d498
Most important restrictions are the following:
- Character Limit – OneDrive 160 characters and Sharepoint Online 400 characters
- View Size – 5000
- Sync Limits in terms of OneDrive and OneDrive for Business. Example: Sync limit per document library for OneDrive for Business is 5000 items.
In many cases, OneDrive and OneDrive for business can provide an effective solution for personal files located on a users computer and/or a small file share that is being used by a small organization, however if you are migrating a large fileshare, then you will need other tools to help you with your migration.
Migration Strategy
It is important to develop a migration strategy along with a test and implementation plan to ensure that all of the stakeholders are aware of what will need to take place and by when. This coordination will allow you to schedule downtime with your employees so that the migration can be successful and you only have to do things one time.
Ongoing Backup and Mirroring Needed
In our evaluation, we have found that using the following tools in sync with one another provides the best case if your migration strategy calls for both a backup solution and mirroring solution:WebDrive – Used to create a mounted drive to your SharePoint Online Document Library or Document Center collection
SyncBack Pro – Utilized to setup and schedule migrations for backup and mirroring. This tool copies the files from your file share to your SharePoint Online share.
Just get the files uploaded!
In order to get the files uploaded in an efficient way without having to have regular scheduled tasks to back up files to SharePoint Online, then our evaluation utilizes the following tool to push the files to Sharepoint quickly:FilesToGo – Files To Go makes your migration to Office 365 smoother, faster and streamlined when you have thousands of files and gigabytes of data to move. Files To Go is compliant with Office 365 file naming standards, limits and boundaries.
Implementation
WebDrive
Designed with IT managers in mind, WebDrive is easy to implement on a large number of desktops. With the ability to embed the registration code, pre-set the connections that your users need and even run automated installs, large implementation could not be easier. And WebDrive’s instantly familiar interface lets you seamlessly work with cloud storage and corporate servers right from your desktop applications, Windows Explorer or Mac Finder.
In the following example for SharePoint Online Document Library access, we utilized WebDrive to create a local file drive. Here are the steps:
- Download and Install WebDrive
- Select Office 365 / Sharepoint Online

- Select the main URL from your SharePoint site where you have your document library installed.Example: https://{yourname}.sharepoint.comIf you are using a Document Center, then you will need to provide the full URL to the site collection containing the document library.Example: https://[yourname].sharepoint.com/sites/[yoursitecollection]/After you have filled in this information, then Login to Sharepoint.

- Finally, enter your file drive information and press connect.

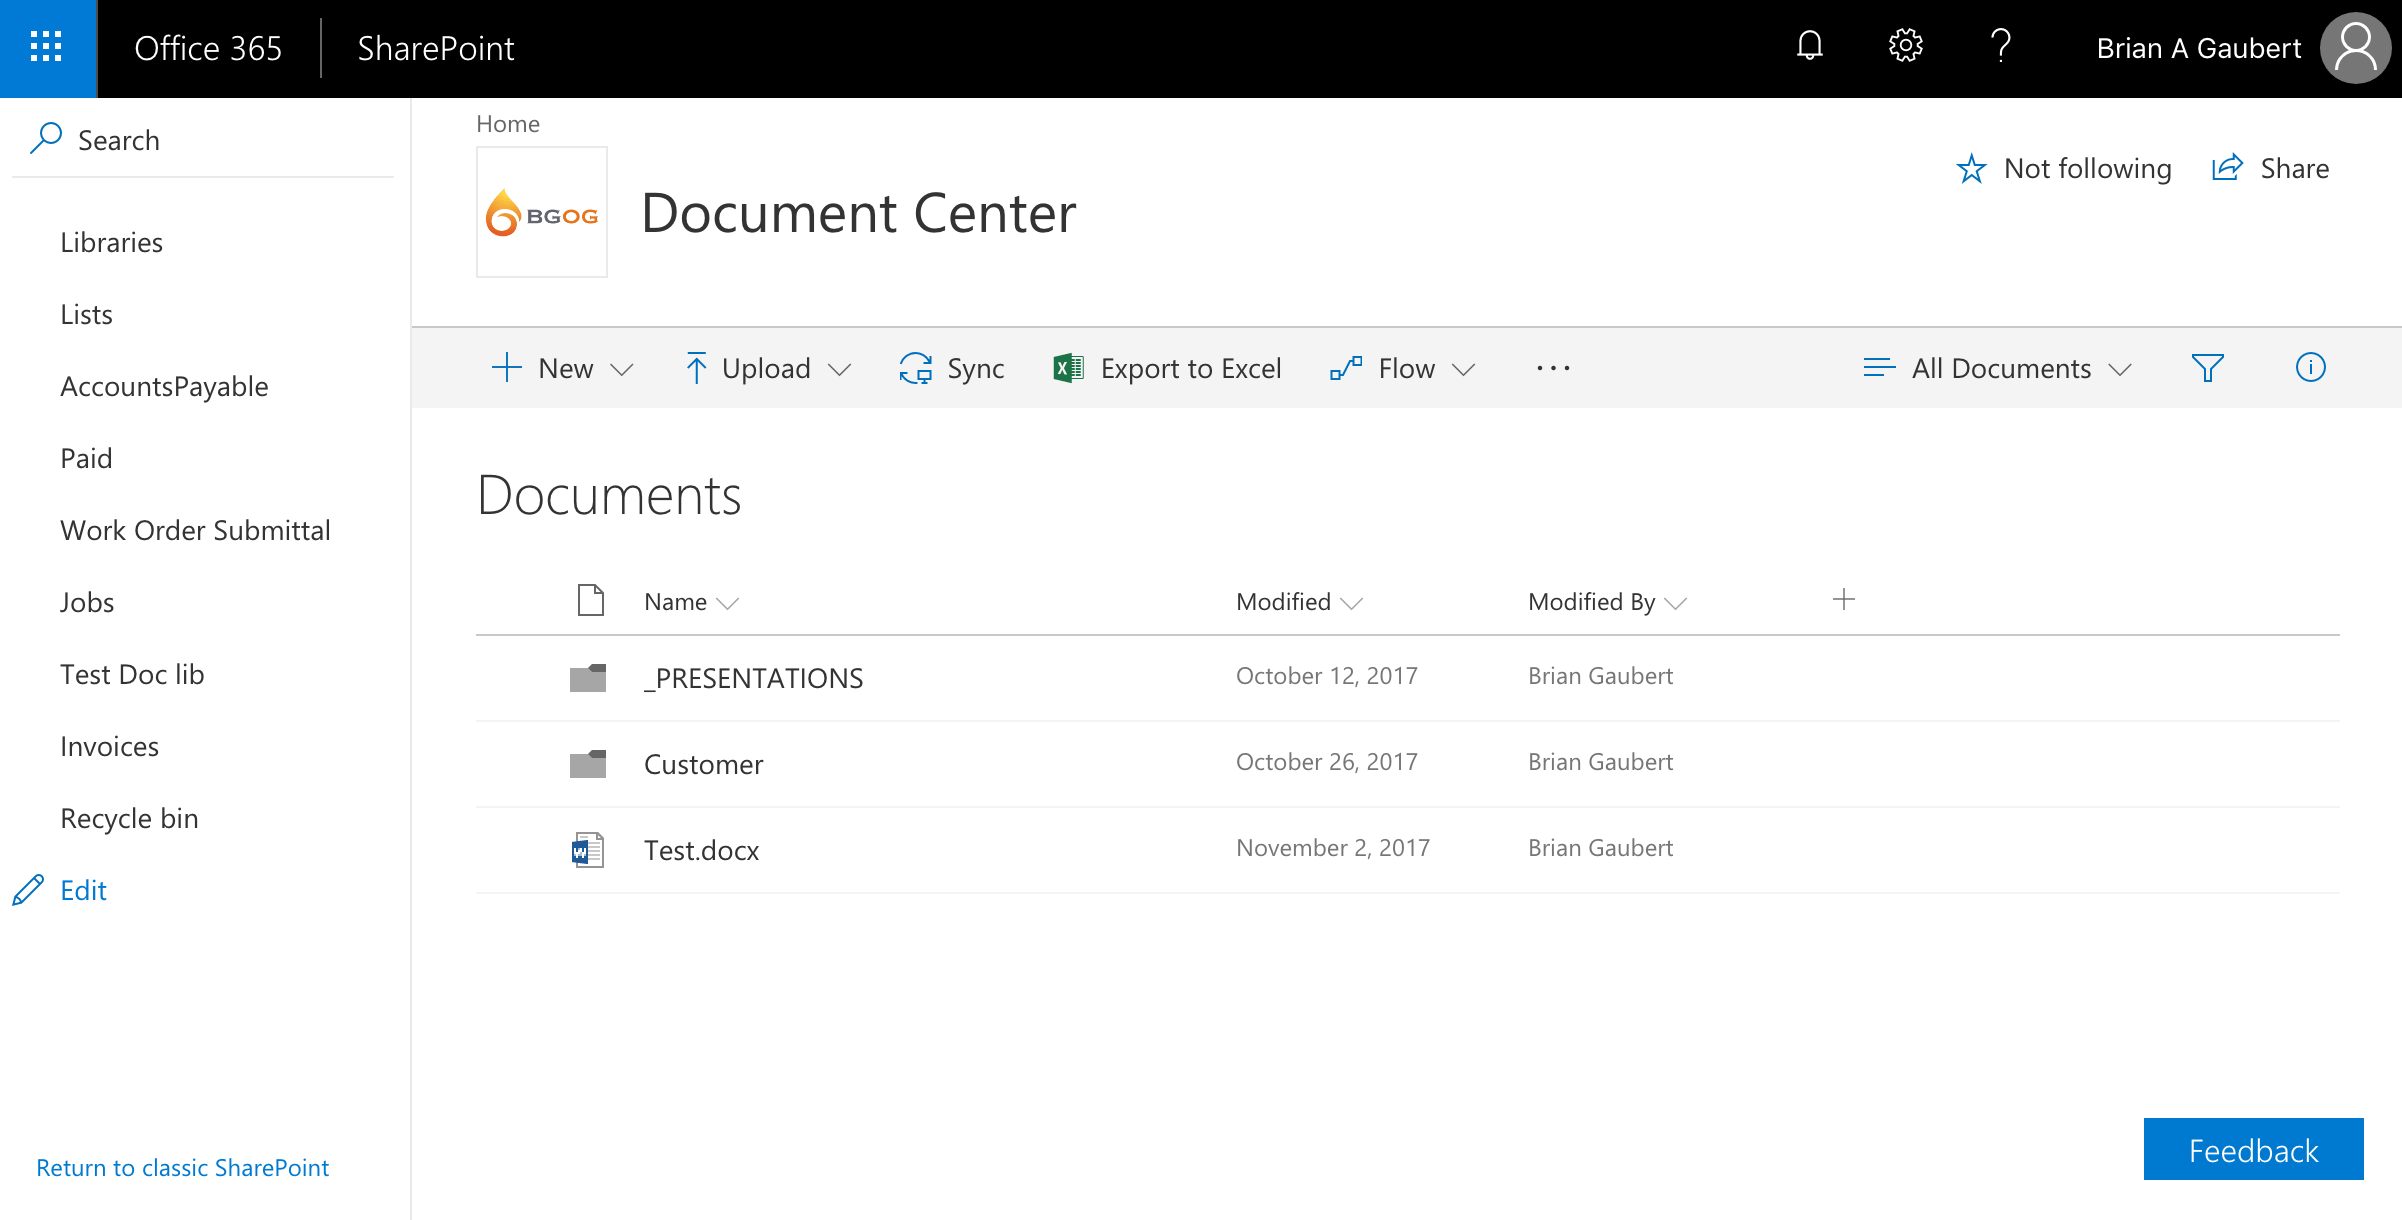
- After you have connected, the following drive now appears as a mapped drive on your computer

SyncBack Pro
SyncBackPro for Windows is used by individuals, small businesses, and mission-critical organizations throughout the world including law enforcement agencies, hospitals, and government departments.
Install SyncBackPro on a Windows computer and backup your data across multiple operating systems using SyncBack Touch (licensed separately). SyncBack Touch works with Windows, macOS, Linux and Android (Mobile phones and Devices).
In the following example, we will show how to build and schedule a profile for backup and mirroring.
Backup
- Download and install SyncBack Pro, then click onto New
- Create a New Profile

- Select Backup as the Profile type that we want to use:

- Keep Source and Destinations as Internal / External drives, Network Path, etc. and click Done

- This will open up the configuration Panel, select your Source and Destination Drives by clicking the
 icon.
icon.
- Next, Click the When on the Left Panel, then click Edit Schedule and select your scheduled options:

- Next, You can elect to do a simulated run to see how this will work. A popup will be presented.
- Next, you can Right-click onto the profile and select Run or Run

- Finally, verify the files are going into the correct locations by going through the drives and verifying.
Mirroring
- Follow the same procedures as above, but select the mirroring option as below:

- The steps for Backup apply the same way. Since you are connecting through WebDrive, you will select the destination folder as your WebDrive folder.
NOTE:
It is important that these options are tested fully within your environment and that you understand the tools and the various options for migrating data. This will be helpful in determining timeouts, popups, unattended sync, etc.
FilesToGo
This tool is an uploader tool to be used for pushing files up to the cloud in a brute force fashion. It should only be utilized for pushing files up to SharePoint online, but gets the job done is a quick manner.
To get started, follow the steps below:
- Download and install FilesToGo
- Enter your site collection. It is important that you enter the full site collection where you have your documents stored, For Example:https://[yourname].sharepoint.com/sites/[yoursitecollection]/

- Browse to the target folder

- Select your local folder

- Choose folders to migrate

- The program will go through and analyze the files and folders to be copied and provide you with a status.

- Click onto Migrate to start and will complete with the following screen
- You can click onto the link A total of 4 files… which will provide an excel sheet of the files moved.

Conclusion
These tools have been utilized in migrations of data to SharePoint because of the limitations in SharePoint Online and other software provided by Microsoft that have failed. It also provides a means for ensuring that files get uploaded correctly without having to write PowerShell scripts and dealing with sustainable authentication issues when connecting to SharePoint Online.
Filter by Category:
- Construction
- Corporate Business
- DevOps
- Digital Marketing
- E-commerce
- Enterprise CMS
- Environmental Services
- Government
- Graphics Design
- Healthcare
- Hospitality
- Industrial
- IoT
- Logistics
- Manufacturing & Engineering
- Medical
- Mobile Apps
- Mobile Apps
- News
- Oil and Gas
- Portal / SharePoint
- Residential & Commercial Energy Services
- Retirement Plan Advisory & Third-Party Administration(TPA)
- SaaS Portal
- SEO Optimization
- Service
- Transportation
- Uncategorized
- Web Development
- Work